I was struggling to find the place where I can change the password for my Jenkins CI account, for sites such as: -
https://issues.jenkins-ci.org/login.jsp
https://issues.jenkins-ci.org/secure/Dashboard.jspa
https://issues.jenkins-ci.org/secure/ManageRapidViews.jspa
https://issues.jenkins-ci.org/projects/WEBSITE/issues/WEBSITE-637?filter=allopenissues
Well, I found it .....
Security through obscurity perhaps ....
https://accounts.jenkins.io/myself/
from where I can add my GitHub ID, add SSH public keys and ..... CHANGE MY FLIPPING PASSWORD.
Good to know !
Wednesday, 18 December 2019
More on Kubernetes - Security
Right now, I'm focused upon Kubernetes security, and these are *some* of my reading / listening materials: -
The Path Less Traveled: Abusing Kubernetes Defaults - Ian Coldwater and Duffie Cooley
K8s Root Demo ( Duffie Cooley again )
Attacking and Defending Kubernetes, with Ian Coldwater
2018-039-Ian Coldwater, kubernetes, container security
plus this: -
Kubernetes via Wikipedia
The Path Less Traveled: Abusing Kubernetes Defaults - Ian Coldwater and Duffie Cooley
K8s Root Demo ( Duffie Cooley again )
Attacking and Defending Kubernetes, with Ian Coldwater
2018-039-Ian Coldwater, kubernetes, container security
plus this: -
Kubernetes via Wikipedia
Tuesday, 17 December 2019
Getting back to basics ... using kubectl to explain ... (almost) everything
Found this in a deck related to K8s security: -
The Path Less Traveled: Abusing Kubernetes Defaults
kubectl explain pods
KIND: Pod
VERSION: v1
DESCRIPTION:
Pod is a collection of containers that can run on a host. This resource is
created by clients and scheduled onto hosts.
FIELDS:
apiVersion
APIVersion defines the versioned schema of this representation of an
object. Servers should convert recognized schemas to the latest internal
value, and may reject unrecognized values. More info:
https://git.k8s.io/community/contributors/devel/sig-architecture/api-conventions.md#resources
kind
Kind is a string value representing the REST resource this object
represents. Servers may infer this from the endpoint the client submits
requests to. Cannot be updated. In CamelCase. More info:
https://git.k8s.io/community/contributors/devel/sig-architecture/api-conventions.md#types-kinds
metadata
Standard object's metadata. More info:
https://git.k8s.io/community/contributors/devel/sig-architecture/api-conventions.md#metadata
spec
Specification of the desired behavior of the pod. More info:
https://git.k8s.io/community/contributors/devel/sig-architecture/api-conventions.md#spec-and-status
status
Most recently observed status of the pod. This data may not be up to date.
Populated by the system. Read-only. More info:
https://git.k8s.io/community/contributors/devel/sig-architecture/api-conventions.md#spec-and-status
kubectl explain nodes
kubectl explain deployments
kubectl explain secrets
kubectl explain roles
kubectl explain replicasets
etc.
In essence, anything that's covered by: -
kubectl api-resources
can be explained 🤣
Istio Explained - Getting Started with Service Mesh
This popped up on Twitter a short while ago: -
Istio Explained - Getting Started with Service Mesh
Microservices can be complicated and difficult to manage, but with this practical guide, you'll learn how service meshes can help you control interactions between the services in your application. Explore what a service mesh is and how it works using Istio—an open source service mesh for managing and securing microservices.
Istio Explained - Getting Started with Service Mesh
It's a free ebook available from my employer, IBM, written by two colleagues, Lin Sun and Daniel Berg
Enjoy !
Istio Explained - Getting Started with Service Mesh
Microservices can be complicated and difficult to manage, but with this practical guide, you'll learn how service meshes can help you control interactions between the services in your application. Explore what a service mesh is and how it works using Istio—an open source service mesh for managing and securing microservices.
Istio Explained - Getting Started with Service Mesh
Enjoy !
Kubernetes - Now the learning really really begins ...
As we hasten towards the end of 2019, my ongoing voyage of discovery that is Kubernetes really really kicks into gear ....
To that end, I've followed a number of useful sources, including: -
Kubernetes on bare-metal in 10 minutes
How to Install and Configure Kubernetes and Docker on Ubuntu 18.04 LTS
Kubernetes Concepts
Quickstart for Calico on Kubernetes
to get a basic four node Kubernetes 1.17 cluster up and running across four Ubuntu VMs.
I'm now starting to play with various aspects of K8s, including labels and taints ...
I also found this to be rather fun: -
What even is a kubelet?
which explained how one can drop a YAML such as this: -
apiVersion: v1
kind: Pod
metadata:
name: nginx
spec:
containers:
- name: nginx
image: nginx
ports:
- containerPort: 80
into here: -
/etc/kubernetes/manifests
and have K8s automagically spin up a pod ( collection of containers ) without fanfare ...
kubectl get pods -A
NAMESPACE NAME READY STATUS RESTARTS AGE
default nginx-hatches1.fyre.ibm.com 1/1 Running 0 13m
kube-system calico-kube-controllers-74c9747c46-vdp6w 1/1 Running 0 21h
kube-system calico-node-cf4mb 0/1 Running 0 21h
kube-system calico-node-h55m5 1/1 Running 0 21h
kube-system calico-node-jdcs5 1/1 Running 0 21h
kube-system calico-node-m6c9k 1/1 Running 0 21h
kube-system coredns-6955765f44-2gp8k 1/1 Running 0 22h
kube-system coredns-6955765f44-rhnww 1/1 Running 0 22h
kube-system etcd-hatches1.fyre.ibm.com 1/1 Running 0 22h
kube-system kube-apiserver-hatches1.fyre.ibm.com 1/1 Running 0 22h
kube-system kube-controller-manager-hatches1.fyre.ibm.com 1/1 Running 0 22h
kube-system kube-proxy-4fxwb 1/1 Running 0 21h
kube-system kube-proxy-j6h5z 1/1 Running 0 21h
kube-system kube-proxy-tzxrt 1/1 Running 0 21h
kube-system kube-proxy-xzzqx 1/1 Running 0 22h
kube-system kube-scheduler-hatches1.fyre.ibm.com 1/1 Running 0 22h
which is nice ....
Final thanks to Julia Evans ( @b0rk on Twitter ) for her awesome blog, including: -
and 'twas she who introduced me to Kamal Marhubi who has written a series of blog posts: -
and the aforementioned: -
In case you wondered, I LOVE MY JOB!!!
Thursday, 12 December 2019
Now we are live - IBM Cloud Hyper Protect Virtual Server
As mentioned before, this is an adjunct to some work that my team and I are doing right now .....
IBM Cloud Hyper Protect Virtual Server
Summary
Create and run virtual servers on IBM LinuxONE, the industry’s most secure Linux-based platform. With an SSH key pair under your control, you have complete authority over your sensitive workloads.
IBM Cloud Hyper Protect Virtual Server
Summary
Create and run virtual servers on IBM LinuxONE, the industry’s most secure Linux-based platform. With an SSH key pair under your control, you have complete authority over your sensitive workloads.
Features
Security
Ability to deploy a Virtual Server in a Secure Service Container ensuring confidentiality of data and code running within the VS
Z Capabilities on the cloud
Ability to deploy workload into the most secure, highly performant, Linux virtual server with extreme vertical scale
Easy to use, open, and flexible
User experience at parity with market leaders both when buying and using the VS; with the openness and flexibility of a public cloud
No Z skills required
Access Z technology without having to purchase, install, and maintain unique hardware
with a set of enablement materials here: -
Monday, 9 December 2019
This just in - RHEL 8.1: A minor release with major new container capabilities
This on the Red Hat Blog: -
The release of Red Hat Enterprise Linux 8.1 is a minor update to RHEL, but a major step forward with containers. The container-tools:rhel8 application stream has been updated with new versions of Podman, Buildah, Skopeo, runc, container selinux policies and other libraries. The core set of base images in Red Hat Universal Base Image (UBI) have been updated to 8.1, and UBI has expanded to include Go 1.11.5 as a developer use case. There are now 37 images released as part of UBI - they can all be seen on the UBI product page. Finally, we have released some really good updated documentation covering rootless, and other new features in the container-tools module.
Now, let’s jump in and cover some major features a bit deeper.
RHEL 8.1: A minor release with major new container capabilities
Off to have a play .....
Monday, 25 November 2019
"WARNING:root:could not open file '/etc/apt/sources.list'"
We saw this: -
WARNING:root:could not open file '/etc/apt/sources.list'
WARNING:root:could not open file '/etc/apt/sources.list'
during a complex series of Docker builds.
After a LOT of investigation, we concluded that it was a combination of a slightly malformed /etc/apt/sources.list file AND the use of the add-apt-repository command.
In essence, sources.list was being slightly truncated by a previous build process, meaning that the very last character of the file was NOT a CR/LF, but was some "special character".
The subsequent use of the add-apt-repository in a Dockerfile: -
add-apt-repository "deb [arch=s390x] https://download.docker.com/linux/ubuntu $(lsb_release -cs) stable"
was completely over-writing the sources.list file with the following TWO lines: -
deb [arch=s390x] https://download.docker.com/linux/ubuntu $(lsb_release -cs) stable
# deb-src [arch=s390x] https://download.docker.com/linux/ubuntu $(lsb_release -cs) stable
I've not quite reproduced the problem manually, despite my best efforts with a hex editor ...
However, the TL;DR; of the situation is that malformed lines in sources.list may be the root cause of all sorts of problems .....
Thursday, 14 November 2019
IBM Cloud Hyper Protect Virtual Servers
This is, in part, upon what I've been working this past six months or so ....
Glad to see a useful rundown of the services and it's capabilities : -
IBM Cloud Hyper Protect Virtual Servers
Gain complete authority over workloads with sensitive data or your business IP
What are IBM Cloud Hyper Protect Virtual Servers?
IBM Cloud™ Hyper Protect Virtual Servers provides complete authority over workloads with sensitive data within a secure virtual server environment. No one, not even cloud admins, can access your workloads.
Built on the security and reliability of the LinuxONE platform, your business IP is protected through data-at-rest and runtime encryption. You can extend and consume on-prem LinuxONE resources in the cloud for faster development, testing and backup, without sacrificing security.
Monday, 11 November 2019
Fun with OpenSSL Certificate Requests and space characters in Subject Names
I've got a command within a Dockerfile that generates a Certificate Service Request, via the openssl req command.
This references an environment variable that contains the required Subject Name: -
export CRT_SUBJ="/C=US/ST=New York/L=Armonk/O=International Business Machines Corporation/CN=securebuildserver"
When I reference this variable in my Dockerfile: -
RUN openssl req -new -x509 -nodes -out server.crt -keyout server.key -subj $CRT_SUBJ
this fails with: -
unknown option York/L=Armonk/O=International
req [options]outfile
This references an environment variable that contains the required Subject Name: -
export CRT_SUBJ="/C=US/ST=New York/L=Armonk/O=International Business Machines Corporation/CN=securebuildserver"
When I reference this variable in my Dockerfile: -
RUN openssl req -new -x509 -nodes -out server.crt -keyout server.key -subj $CRT_SUBJ
this fails with: -
unknown option York/L=Armonk/O=International
req [options]
Note that it's failing to digest the Subject Name, specifically at the first space character, between New and York.
The solution ?
Wrap the environment variable in double-quotes: -
RUN openssl req -new -x509 -nodes -out server.crt -keyout server.key -subj "$CRT_SUBJ"
which works a treat ......
Friday, 1 November 2019
Using awk to munge SSH private keys
One of those "because I needed to" answers ....
Having generated a SSH public/private key pair: -
ssh-keygen -t rsa -b 4096 -f /tmp/this_is_a_test -N ""
Having generated a SSH public/private key pair: -
ssh-keygen -t rsa -b 4096 -f /tmp/this_is_a_test -N ""
I wanted to get the private key: -
-----BEGIN OPENSSH PRIVATE KEY-----
b3BlbnNzaC1rZXktdjEAAAAABG5vbmUAAAAEbm9uZQAAAAAAAAABAAACFwAAAAdzc2gtcn
NhAAAAAwEAAQAAAgEAnonsGDeVoFfKyCTzsbof7SL5TWE2a5vWfEHq9fHFNH1WhRYKYm9z
E0SLTnS/uYUT4rs8LfxT4vUYGgoNrtY9BH3V8U624CAsSuKdVc4PQdDt5r7CIZmhqIhEh1
ooMB/Ih0C83j6mU653n5bOBDTf1C8wSBBsZnZoivf0OX/MsHutJZCm1xgMT3NStBPFYhpO
sqqWmMXrOJEBgNR880ECB2SBB29XmmhI2SYlzp3ZvTnGS1FCo4LctGkN7uaMFTMZx4QJgz
v7DCeJuhzOcOSw54F4vJX3JGI9c49CBL7g2bxkzh83UpFZiOzVnwzabzkFIRgfC5eFfcxk
NUxTpCPMpfZX0MAKRMJb59wPSXHPA0pisBEIu9gZOUrDeFmZlwUPuVH4i5wCb/rW2Ynkyf
TKhz8bdC2dCj9/BAUv3axsWNjfgA4J/PvUgZ8yr3+zceRUcG+rzi8AFimR5H4QHMzTP9js
PQ3cQ73OUpK0yl/ER+ibqhfkuz2HlEml8WOEEx5ChzSa+jvxzBBsYS3y4ebGbDbn/hBY2w
L/ZSNeXbfx9iq7docW6U2tVcmuMDN1Voadd1V9cKIWsbJ+/UuPWyLLTw2PjpmyNPQJXPrr
63vXaYskKZOZJ9pFqygZJxe6wepc+XluPkbpf1EmXZKy2wJyJPC/DImCmPDgoT6aslQVCg
sAAAdIY7RrvWO0a70AAAAHc3NoLXJzYQAAAgEAnonsGDeVoFfKyCTzsbof7SL5TWE2a5vW
fEHq9fHFNH1WhRYKYm9zE0SLTnS/uYUT4rs8LfxT4vUYGgoNrtY9BH3V8U624CAsSuKdVc
4PQdDt5r7CIZmhqIhEh1ooMB/Ih0C83j6mU653n5bOBDTf1C8wSBBsZnZoivf0OX/MsHut
JZCm1xgMT3NStBPFYhpOsqqWmMXrOJEBgNR880ECB2SBB29XmmhI2SYlzp3ZvTnGS1FCo4
LctGkN7uaMFTMZx4QJgzv7DCeJuhzOcOSw54F4vJX3JGI9c49CBL7g2bxkzh83UpFZiOzV
nwzabzkFIRgfC5eFfcxkNUxTpCPMpfZX0MAKRMJb59wPSXHPA0pisBEIu9gZOUrDeFmZlw
UPuVH4i5wCb/rW2YnkyfTKhz8bdC2dCj9/BAUv3axsWNjfgA4J/PvUgZ8yr3+zceRUcG+r
zi8AFimR5H4QHMzTP9jsPQ3cQ73OUpK0yl/ER+ibqhfkuz2HlEml8WOEEx5ChzSa+jvxzB
BsYS3y4ebGbDbn/hBY2wL/ZSNeXbfx9iq7docW6U2tVcmuMDN1Voadd1V9cKIWsbJ+/UuP
WyLLTw2PjpmyNPQJXPrr63vXaYskKZOZJ9pFqygZJxe6wepc+XluPkbpf1EmXZKy2wJyJP
C/DImCmPDgoT6aslQVCgsAAAADAQABAAACAES9iKD3eOkNJ9+gJgnpqe4oO/BRNkdySo2W
B0qcieU4c0tBQz9rE3pHPh/Gf1rxWK32gSFvRvAhVVH1CfnE6rAH37vBZYnIaWwO1ileLz
9aV8y06XeoJW/tpckKTmKPZWM/rqSuhW/DNhr8SFeKlYJq84RLmrTSooGfAUXtI9NhzLF9
Bto8kxnf5vwtlmfzACx3ytRy/IqKVRyHBaZziW2rJkcS/+jzTqLY54uu5bomUtRVZ49+Lj
QLWP8894A5p/PaTEWavD+I5S7NTrWkcw/uE2uxmncsIXj5pKZqHRRLm2nEHzitzSSRjA5q
hEu1bYPr8YoVKMxi0xBJB/sjipe8XHPUGskw0XBhklwvGAq6HFMWWNScgNl5wDksb4TPwU
REjcEBsd4CrW1mUNZcaj0lib55TEGcaU9tghmMSmMmjHMF58ZvE3DqaXL+VfjQS1YXiFYX
UBJP4QQl3gDG5ypRCrr69FLahigGCnd/FIWev8BhoFolHft2gb/IJu36JeJ+24V4bHT7oG
2G2LLIoNFe0XL0GvlbyNEKRgtLcAijBhDUZs9UEztH4gmFwAPGisbT+hhlhdC3kpxNARTT
HskggYe//W1ZRX2/pIrw5oRn9g1UZ5A0Syla7Cw0JI0Jgcz5C5YQnMTD58jHOZZeb3zBEZ
XfNrkXPkXEnBkO6dgBAAABAAIePVO0JuF16FYKjdFhKwvGKmgc0+kulT16o9kjFlcj94lx
3MnAMldO8uPEm7IBdQtcF5k6MN3lLjSQF0AN/byJ7tK9+N6o/UQ6VFSR2TkcPc41/J6xH2
oERUXt7pJyygkRjDSotWFnZBzA6LcMiRi5NDjq9wXhNPPbl7Bi1LokZ0Bo6szVfwFSL5F2
cyr20yXqyIX3hIduHfhRrNsMt+DgPHsg45Az3xu1H8eyT2K8YkyMjCDeNmm/PXLv2bQa/f
dszZ+KOa4ORiNj/GnPyqM2vZJwY5wk0RCgCujr9pg7zgzjGxw2BsRxE1/rAASiqnn1iGT3
EPKBFPKViKJ2TtsAAAEBANImJ7PZLFiPwXui9TK/QdhiY9a9+ZE0HOAhVTMvJEMKAtwqak
RpjUVerlnX6KB/F7AX9TV472XTQqJSoHvwhImkWhe5EtHzKjkr/Al8pyQo44yy1Nw0vEfM
ryI7oZddx+tNZDguncyn12H3mxd3hI/qt9Y8rgmcGLsjq3T73OvVDcXueofFj2JEzzcdOj
9ebtfJIrd93xsJXlGr0KdHG0Ozz8uL6nBUpvWgQjp+cyNBkmw9NbsX7zP8h2xmVuY4ofr+
1PvyoKHzY0TdidUKEk6qgskd9wSoxsb7iWEWGpfKeMzIrGRqBfdZI14nCRLQI+vvYX+Z8a
0gFDNNWcpwL8cAAAEBAMEhFQGuhm9SxQ1fFoofYP5Vgx9ftIkCB7VbVhAjqYoKJRxGAhFf
hNSAYlx2bHQAQCMhuufmdQGlBKPcBbVZYkh1uo2224sWrMBPqU0yQlV3UAgtCAd+3jTpWj
KV3OT0cs8pHfj/+Wlt9CldfsOUN1pfXlong1oLejgMKZceyYCpwb/9LjoQupbmC9g4To+X
COgINdHPnpV9sePwoILfJIhWwHCpzw4LSIeuozxWg54J5l0ibMeWfMB/ZgTzFxTmmg1Htr
g5Z7hCKhjrHWwfT5w8oYHuwLpEaKYcZhIq/D2ujWfQGbPp8rbORCj+Ssz8SBOsSk+PpEGG
DivcpWlUW50AAAAOaGF5ZEBEYXZlcy1NQlABAgMEBQ==
-----END OPENSSH PRIVATE KEY-----
into a format suitable to be pasted into a JSON document: -
"GITHUB_KEY":"-----BEGIN OPENSSH PRIVATE KEY-----
-----END OPENSSH PRIVATE KEY-----\n",
with the \n characters replacing the CR/LF at the end of each line.
Initially I munged the file using TextEdit and search / replace, but that's so "Like a cave person".
Thankfully, there's (always) a better way ...
awk '{printf "%s\\n", $0}' /tmp/this_is_a_test
which returns: -
-----BEGIN OPENSSH PRIVATE KEY-----\nb3BlbnNzaC1rZXktdjEAAAAABG5vbmUAAAAEbm9uZQAAAAAAAAABAAACFwAAAAdzc2gtcn\nNhAAAAAwEAAQAAAgEAnonsGDeVoFfKyCTzsbof7SL5TWE2a5vWfEHq9fHFNH1WhRYKYm9z\nE0SLTnS/uYUT4rs8LfxT4vUYGgoNrtY9BH3V8U624CAsSuKdVc4PQdDt5r7CIZmhqIhEh1\nooMB/Ih0C83j6mU653n5bOBDTf1C8wSBBsZnZoivf0OX/MsHutJZCm1xgMT3NStBPFYhpO\nsqqWmMXrOJEBgNR880ECB2SBB29XmmhI2SYlzp3ZvTnGS1FCo4LctGkN7uaMFTMZx4QJgz\nv7DCeJuhzOcOSw54F4vJX3JGI9c49CBL7g2bxkzh83UpFZiOzVnwzabzkFIRgfC5eFfcxk\nNUxTpCPMpfZX0MAKRMJb59wPSXHPA0pisBEIu9gZOUrDeFmZlwUPuVH4i5wCb/rW2Ynkyf\nTKhz8bdC2dCj9/BAUv3axsWNjfgA4J/PvUgZ8yr3+zceRUcG+rzi8AFimR5H4QHMzTP9js\nPQ3cQ73OUpK0yl/ER+ibqhfkuz2HlEml8WOEEx5ChzSa+jvxzBBsYS3y4ebGbDbn/hBY2w\nL/ZSNeXbfx9iq7docW6U2tVcmuMDN1Voadd1V9cKIWsbJ+/UuPWyLLTw2PjpmyNPQJXPrr\n63vXaYskKZOZJ9pFqygZJxe6wepc+XluPkbpf1EmXZKy2wJyJPC/DImCmPDgoT6aslQVCg\nsAAAdIY7RrvWO0a70AAAAHc3NoLXJzYQAAAgEAnonsGDeVoFfKyCTzsbof7SL5TWE2a5vW\nfEHq9fHFNH1WhRYKYm9zE0SLTnS/uYUT4rs8LfxT4vUYGgoNrtY9BH3V8U624CAsSuKdVc\n4PQdDt5r7CIZmhqIhEh1ooMB/Ih0C83j6mU653n5bOBDTf1C8wSBBsZnZoivf0OX/MsHut\nJZCm1xgMT3NStBPFYhpOsqqWmMXrOJEBgNR880ECB2SBB29XmmhI2SYlzp3ZvTnGS1FCo4\nLctGkN7uaMFTMZx4QJgzv7DCeJuhzOcOSw54F4vJX3JGI9c49CBL7g2bxkzh83UpFZiOzV\nnwzabzkFIRgfC5eFfcxkNUxTpCPMpfZX0MAKRMJb59wPSXHPA0pisBEIu9gZOUrDeFmZlw\nUPuVH4i5wCb/rW2YnkyfTKhz8bdC2dCj9/BAUv3axsWNjfgA4J/PvUgZ8yr3+zceRUcG+r\nzi8AFimR5H4QHMzTP9jsPQ3cQ73OUpK0yl/ER+ibqhfkuz2HlEml8WOEEx5ChzSa+jvxzB\nBsYS3y4ebGbDbn/hBY2wL/ZSNeXbfx9iq7docW6U2tVcmuMDN1Voadd1V9cKIWsbJ+/UuP\nWyLLTw2PjpmyNPQJXPrr63vXaYskKZOZJ9pFqygZJxe6wepc+XluPkbpf1EmXZKy2wJyJP\nC/DImCmPDgoT6aslQVCgsAAAADAQABAAACAES9iKD3eOkNJ9+gJgnpqe4oO/BRNkdySo2W\nB0qcieU4c0tBQz9rE3pHPh/Gf1rxWK32gSFvRvAhVVH1CfnE6rAH37vBZYnIaWwO1ileLz\n9aV8y06XeoJW/tpckKTmKPZWM/rqSuhW/DNhr8SFeKlYJq84RLmrTSooGfAUXtI9NhzLF9\nBto8kxnf5vwtlmfzACx3ytRy/IqKVRyHBaZziW2rJkcS/+jzTqLY54uu5bomUtRVZ49+Lj\nQLWP8894A5p/PaTEWavD+I5S7NTrWkcw/uE2uxmncsIXj5pKZqHRRLm2nEHzitzSSRjA5q\nhEu1bYPr8YoVKMxi0xBJB/sjipe8XHPUGskw0XBhklwvGAq6HFMWWNScgNl5wDksb4TPwU\nREjcEBsd4CrW1mUNZcaj0lib55TEGcaU9tghmMSmMmjHMF58ZvE3DqaXL+VfjQS1YXiFYX\nUBJP4QQl3gDG5ypRCrr69FLahigGCnd/FIWev8BhoFolHft2gb/IJu36JeJ+24V4bHT7oG\n2G2LLIoNFe0XL0GvlbyNEKRgtLcAijBhDUZs9UEztH4gmFwAPGisbT+hhlhdC3kpxNARTT\nHskggYe//W1ZRX2/pIrw5oRn9g1UZ5A0Syla7Cw0JI0Jgcz5C5YQnMTD58jHOZZeb3zBEZ\nXfNrkXPkXEnBkO6dgBAAABAAIePVO0JuF16FYKjdFhKwvGKmgc0+kulT16o9kjFlcj94lx\n3MnAMldO8uPEm7IBdQtcF5k6MN3lLjSQF0AN/byJ7tK9+N6o/UQ6VFSR2TkcPc41/J6xH2\noERUXt7pJyygkRjDSotWFnZBzA6LcMiRi5NDjq9wXhNPPbl7Bi1LokZ0Bo6szVfwFSL5F2\ncyr20yXqyIX3hIduHfhRrNsMt+DgPHsg45Az3xu1H8eyT2K8YkyMjCDeNmm/PXLv2bQa/f\ndszZ+KOa4ORiNj/GnPyqM2vZJwY5wk0RCgCujr9pg7zgzjGxw2BsRxE1/rAASiqnn1iGT3\nEPKBFPKViKJ2TtsAAAEBANImJ7PZLFiPwXui9TK/QdhiY9a9+ZE0HOAhVTMvJEMKAtwqak\nRpjUVerlnX6KB/F7AX9TV472XTQqJSoHvwhImkWhe5EtHzKjkr/Al8pyQo44yy1Nw0vEfM\nryI7oZddx+tNZDguncyn12H3mxd3hI/qt9Y8rgmcGLsjq3T73OvVDcXueofFj2JEzzcdOj\n9ebtfJIrd93xsJXlGr0KdHG0Ozz8uL6nBUpvWgQjp+cyNBkmw9NbsX7zP8h2xmVuY4ofr+\n1PvyoKHzY0TdidUKEk6qgskd9wSoxsb7iWEWGpfKeMzIrGRqBfdZI14nCRLQI+vvYX+Z8a\n0gFDNNWcpwL8cAAAEBAMEhFQGuhm9SxQ1fFoofYP5Vgx9ftIkCB7VbVhAjqYoKJRxGAhFf\nhNSAYlx2bHQAQCMhuufmdQGlBKPcBbVZYkh1uo2224sWrMBPqU0yQlV3UAgtCAd+3jTpWj\nKV3OT0cs8pHfj/+Wlt9CldfsOUN1pfXlong1oLejgMKZceyYCpwb/9LjoQupbmC9g4To+X\nCOgINdHPnpV9sePwoILfJIhWwHCpzw4LSIeuozxWg54J5l0ibMeWfMB/ZgTzFxTmmg1Htr\ng5Z7hCKhjrHWwfT5w8oYHuwLpEaKYcZhIq/D2ujWfQGbPp8rbORCj+Ssz8SBOsSk+PpEGG\nDivcpWlUW50AAAAOaGF5ZEBEYXZlcy1NQlABAgMEBQ==\n-----END OPENSSH PRIVATE KEY-----\n
Of course, an alternate mechanism ( or many ) exists : -
sed 's/$/\\n/' /tmp/this_is_a_test | tr -d '\n'
Thanks Internet, you rock: -
Wednesday, 16 October 2019
Right Sed Fred!
I've been using the Stream Editor (sed) for the past few years, and especially love it's ability to do in-place editing of a file as per this example: -
sed -i'' "s/PidFile\ logs/PidFile\ ${Product}\/logs/g" /opt/ibm/HTTPServer/${Product}/conf/httpd.conf
sed -i'' "s/PidFile\ logs/PidFile\ ${Product}\/logs/g" /opt/ibm/HTTPServer/${Product}/conf/httpd.conf
so I was somewhat surprised to find it that it seemed to bork on macOS Catalina this morning: -
as per this terrible ( REALLY ) example: -
sed -i'' 's/PRIVATE/PUBLIC/g' dave.key
sed: 1: "dave.key": extra characters at the end of d command
even though the same command worked on Ubuntu 18.04.02.
Assuming it to be a version thing, I checked the version of sed shipped with Ubuntu: -
sed --version
sed (GNU sed) 4.4
Copyright (C) 2017 Free Software Foundation, Inc.
License GPLv3+: GNU GPL version 3 or later .
This is free software: you are free to change and redistribute it.
There is NO WARRANTY, to the extent permitted by law.
Written by Jay Fenlason, Tom Lord, Ken Pizzini,
and Paolo Bonzini.
GNU sed home page: .
General help using GNU software: .
E-mail bug reports to: .
and, guess what, the --version or -v or --v switches don't even work on the macOS version :-(
It transpires that the macOS version is based upon BSD Unix, which kinda makes sense given its roots from Mach etc.
This helped: -
The key thing ....
On macOS, the cheat for in-place editing is simple ....
Rather than this: -
sed -i'' 's/PRIVATE/PUBLIC/g' dave.key
I used this: -
sed -i '' 's/PRIVATE/PUBLIC/g' dave.key
Yep, I added a space between -i and the single quote symbols !
PS Do NOT NOT NOT hand-edit your private OR public keys!!!
"unable to set private key file" - more fun with openSSL and certificates
Another long story cut short, but I saw this: -
curl: (58) unable to set private key file: 'dave.pem' type PEM
curl: (58) unable to set private key file: 'dave.pem' type PEM
from my Ansible/Python code, whilst attempting to use a PEM certificate that I'd generated myself: -
Generate Private Key
openssl genrsa -out key.pem 2048
Generate Certificate Service Request
openssl req -subj '/C=GB/O=IBM/CN=davehay' -new -key key.pem -out csr.pem
Generate Personal Certificate
openssl x509 -req -days 9999 -in csr.pem -signkey key.pem -out cert.pem
Having munged the key and certificate into a single PEM file: -
cat key.pem cert.pem > dave.pem
I found that my Python code was then validating the private key within dave.pem : -
cert_pkey.split('-----BEGIN PRIVATE KEY-----')
which meant that it was failing ...
Simple solution, right ?
Yeah, I edited dave.pem to remove the characters RSA from the PEM file: -
sed -i '' 's/RSA //g' dave.pem
Problem solved, right ?
NAH!!
My code, which uses cURL under the covers, then failed with: -
curl: (58) unable to set private key file: 'dave.pem' type PEM
This blog post: -
described how one can validate the private key and its certificate: -
openssl x509 -noout -modulus -in dave.pem | openssl md5
which returns a MD5 checksum: -
0d6b9d546ff1b65284ec32096bea2904
and: -
openssl rsa -noout -modulus -in dave.pem | openssl md5
which SHOULD return a MD5 checksum, but instead returned: -
unable to load Private Key
4686818796:error:0DFFF0A8:asn1 encoding routines:CRYPTO_internal:wrong tag:/BuildRoot/Library/Caches/com.apple.xbs/Sources/libressl/libressl-47.11.1/libressl-2.8/crypto/asn1/tasn_dec.c:1144:
4686818796:error:0DFFF03A:asn1 encoding routines:CRYPTO_internal:nested asn1 error:/BuildRoot/Library/Caches/com.apple.xbs/Sources/libressl/libressl-47.11.1/libressl-2.8/crypto/asn1/tasn_dec.c:317:Type=X509_ALGOR
4686818796:error:0DFFF03A:asn1 encoding routines:CRYPTO_internal:nested asn1 error:/BuildRoot/Library/Caches/com.apple.xbs/Sources/libressl/libressl-47.11.1/libressl-2.8/crypto/asn1/tasn_dec.c:646:Field=pkeyalg, Type=PKCS8_PRIV_KEY_INFO
4686818796:error:09FFF00D:PEM routines:CRYPTO_internal:ASN1 lib:/BuildRoot/Library/Caches/com.apple.xbs/Sources/libressl/libressl-47.11.1/libressl-2.8/crypto/pem/pem_pkey.c:143:
d41d8cd98f00b204e9800998ecf8427e
Yeah, you guessed it, I broke my private key by removing RSA :-)
It was relatively easy to fix, it was all down to the way that I was generating my key and certificate. I switched to this: -
openssl req -subj '/C=GB/O=IBM/CN=davehay' -new -newkey rsa:2048 -days 365 -nodes -x509 -sha256 -keyout dave.key -out dave.crt
and, after munging the key and certificate: -
cat dave.key dave.crt > dave.pem
I ended up with a PEM file that I did NOT need to edit i.e. it contained the key (!) string: -
-----BEGIN PRIVATE KEY-----
and, more importantly, it validated without problems: -
openssl x509 -noout -modulus -in dave.pem | openssl md5
1c03038c6be240c22d759bfef58e9db2
openssl rsa -noout -modulus -in dave.pem | openssl md5
1c03038c6be240c22d759bfef58e9db2
and, even more importantly, my code works!!!
Moral of the story ? Don't manually hack your keys, instead check the way that you're generating them in the first place :-)
Monday, 14 October 2019
More about OpenSSL and PKCS12 certificates .... some INFO
So, having written this: -
Client Authentication and tinkering with various certificate formats
a few days back, I realised that I'd neglected to describe how one can validate a PKCS12 certificate.
So here we go ...
Having exported my PEM file into PKCS12 format: -
openssl pkcs12 -export -out dave.p12 -in dave.pem
or: -
openssl pkcs12 -export -out dave.pfx -in dave.pem
I can validate the resulting certificate / private key as follows: -
openssl pkcs12 -info -in dave.p12
Enter Import Password:
MAC Iteration 2048
MAC verified OK
PKCS7 Encrypted data: pbeWithSHA1And40BitRC2-CBC, Iteration 2048
Certificate bag
Bag Attributes
localKeyID: C4 40 FE 9E 1A 30 48 24 B1 59 94 1C 9A 6A EB 65 04 DA A9 AF
subject=/CN=51bceeff97c5
issuer=/CN=51bceeff97c5
-----BEGIN CERTIFICATE-----
MIICojCCAYoCAQEwDQYJKoZIhvcNAQEEBQAwFzEVMBMGA1UEAwwMNTFiY2VlZmY5
N2M1MB4XDTE5MTAxMzA3NDIzNFoXDTIwMTAxMjA3NDIzNFowFzEVMBMGA1UEAwwM
NTFiY2VlZmY5N2M1MIIBIjANBgkqhkiG9w0BAQEFAAOCAQ8AMIIBCgKCAQEA380u
JElYYA8TqhQdflnQW/A73OTpsc67meB9Adi4vTvwc9VP51BI/IkupRfC71IFJg/c
wmPZWQC8Mx/TF2s5XOPWrAOQRGu4cmh2fOG9E4ZJCSq9kzqGZ3BBUTyqC6ZtGad/
VBloOjw7e9D2sWuVDZqwWqo6nGcF2i/ZVDeUYyBa9ul8+opes7ufRZdbDI9s5iOc
LH+6cxL3efmLZIUVMg8/jvC9nzIRTYk0mmYsyPAJcvIvy9RoxLHG62UjmS2lLJN3
RE/jyDj29Xi5Aokplz5pnYoAxzPo9YmUAwlLDD6vYJCa6B2q5votu7NFJ6ttF4Io
/bolg+PyYfLE2nsHOwIDAQABMA0GCSqGSIb3DQEBBAUAA4IBAQCdxsDo+8E7VqMo
I3bke3j2vSnB/KLE+5UpeRsXhO4zRVAcJbVEuppJFkCwxL0ZLOfoQH+yGcdANa7v
9Fh+JTlDInokrwOIQDsh1X09s/Ca3LlWx9pnuOC39gA6XeqO3b75FXq9FLBhNFGO
LSiNtruqXcIgEK3IK2T9DRfR/D1B9TlAONGfAFpIT+szog2LFG3NwyNiaxRRNcR0
ZLpSqWOkkBrKKSaDTn4KRynh5Hs/ZbcsApybXz56rr+NsR9o6T7IhFkAUtzLhW+U
+YqT07fCJ8MHy6FMIz80HpVlktA1Tj790Ynk4YAL9IB2AObxXdSRcoSHBkl4frQP
Jm+0QNEr
-----END CERTIFICATE-----
PKCS7 Data
Shrouded Keybag: pbeWithSHA1And3-KeyTripleDES-CBC, Iteration 2048
Bag Attributes
localKeyID: C4 40 FE 9E 1A 30 48 24 B1 59 94 1C 9A 6A EB 65 04 DA A9 AF
Key Attributes:
Enter PEM pass phrase:
Note that this works for a PKCS12 file, whether it's got a .P12 or .PFX extension or otherwise ...
openssl pkcs12 -info -in dave.foobarsnafu
Enter Import Password:
MAC Iteration 2048
MAC verified OK
PKCS7 Encrypted data: pbeWithSHA1And40BitRC2-CBC, Iteration 2048
Certificate bag
Bag Attributes
localKeyID: C4 40 FE 9E 1A 30 48 24 B1 59 94 1C 9A 6A EB 65 04 DA A9 AF
subject=/CN=51bceeff97c5
issuer=/CN=51bceeff97c5
-----BEGIN CERTIFICATE-----
MIICojCCAYoCAQEwDQYJKoZIhvcNAQEEBQAwFzEVMBMGA1UEAwwMNTFiY2VlZmY5
N2M1MB4XDTE5MTAxMzA3NDIzNFoXDTIwMTAxMjA3NDIzNFowFzEVMBMGA1UEAwwM
NTFiY2VlZmY5N2M1MIIBIjANBgkqhkiG9w0BAQEFAAOCAQ8AMIIBCgKCAQEA380u
JElYYA8TqhQdflnQW/A73OTpsc67meB9Adi4vTvwc9VP51BI/IkupRfC71IFJg/c
wmPZWQC8Mx/TF2s5XOPWrAOQRGu4cmh2fOG9E4ZJCSq9kzqGZ3BBUTyqC6ZtGad/
VBloOjw7e9D2sWuVDZqwWqo6nGcF2i/ZVDeUYyBa9ul8+opes7ufRZdbDI9s5iOc
LH+6cxL3efmLZIUVMg8/jvC9nzIRTYk0mmYsyPAJcvIvy9RoxLHG62UjmS2lLJN3
RE/jyDj29Xi5Aokplz5pnYoAxzPo9YmUAwlLDD6vYJCa6B2q5votu7NFJ6ttF4Io
/bolg+PyYfLE2nsHOwIDAQABMA0GCSqGSIb3DQEBBAUAA4IBAQCdxsDo+8E7VqMo
I3bke3j2vSnB/KLE+5UpeRsXhO4zRVAcJbVEuppJFkCwxL0ZLOfoQH+yGcdANa7v
9Fh+JTlDInokrwOIQDsh1X09s/Ca3LlWx9pnuOC39gA6XeqO3b75FXq9FLBhNFGO
LSiNtruqXcIgEK3IK2T9DRfR/D1B9TlAONGfAFpIT+szog2LFG3NwyNiaxRRNcR0
ZLpSqWOkkBrKKSaDTn4KRynh5Hs/ZbcsApybXz56rr+NsR9o6T7IhFkAUtzLhW+U
+YqT07fCJ8MHy6FMIz80HpVlktA1Tj790Ynk4YAL9IB2AObxXdSRcoSHBkl4frQP
Jm+0QNEr
-----END CERTIFICATE-----
PKCS7 Data
Shrouded Keybag: pbeWithSHA1And3-KeyTripleDES-CBC, Iteration 2048
Bag Attributes
localKeyID: C4 40 FE 9E 1A 30 48 24 B1 59 94 1C 9A 6A EB 65 04 DA A9 AF
Key Attributes:
Enter PEM pass phrase:
WebSphere Liberty Profile and DB2 in Docker - There's more ...
I wrote about this a few months back: -
IBM WebSphere Liberty Profile and IBM DB2 and Docker - An approach
and had a query from a colleague last week.
So I did some of again ....
The context is that my colleague was looking to run a Java class, using the DB2 JDBC JCC4 drivers, where DB2 was running in a Docker container.
So I replicated this, using Liberty as my Java runtime ....
Here's the details: -
Create a directory on the host for DB2 to use for its datastore
mkdir /tmp/db2data
Start a DB2 container
docker run -itd --name mydb2 --privileged=true -p 50000:50000 -e LICENSE=accept -e DB2INST1_PASSWORD=p455w0rd -e DBNAME=testdb -v /tmp/db2data:/database ibmcom/db2
Check the container logs for the DB2 startup
docker logs mydb2 -f
Open a shell into the DB2 container
docker exec -it mydb2 /bin/bash
Switch to db2inst1 instance account
su - db2inst1
Create the DB2 sample database
db2sampl
Quit back to the host OS
exit
exit
Copy the DB2 JDBC JCC4 driver AND license file out of the DB2 container
docker cp mydb2:/opt/ibm/db2/V11.5/java/db2jcc4.jar .
docker cp mydb2:/opt/ibm/db2/V11.5/java/db2jcc_license_cu.jar .
Create a Dockerfile to spin up a Liberty container using the DB2 JAR files
vi Dockerfile
FROM websphere-liberty:latest
ENV LICENSE accept
COPY db2jcc4.jar /
COPY db2jcc_license_cu.jar /
COPY JdbcTestDB2.class /
CMD ["java","-cp","/:/db2jcc4.jar","JdbcTestDB2","carded1.fyre.ibm.com","50000","sample","db2inst1 ","p455w0rd"]
Start the Liberty container
docker run -dt --name mywlp wlp:latest
Check the Liberty logs
000010 CHRISTINE HAAS
000020 MICHAEL THOMPSON
000030 SALLY KWAN
000050 JOHN GEYER
000060 IRVING STERN
000070 EVA PULASKI
000090 EILEEN HENDERSON
000100 THEODORE SPENSER
000110 VINCENZO LUCCHESSI
000120 SEAN O'CONNELL
000130 DELORES QUINTANA
000140 HEATHER NICHOLLS
000150 BRUCE ADAMSON
000160 ELIZABETH PIANKA
000170 MASATOSHI YOSHIMURA
000180 MARILYN SCOUTTEN
000190 JAMES WALKER
000200 DAVID BROWN
000210 WILLIAM JONES
000220 JENNIFER LUTZ
000230 JAMES JEFFERSON
000240 SALVATORE MARINO
000250 DANIEL SMITH
000260 SYBIL JOHNSON
000270 MARIA PEREZ
000280 ETHEL SCHNEIDER
000290 JOHN PARKER
000300 PHILIP SMITH
000310 MAUDE SETRIGHT
000320 RAMLAL MEHTA
000330 WING LEE
000340 JASON GOUNOT
200010 DIAN HEMMINGER
200120 GREG ORLANDO
200140 KIM NATZ
200170 KIYOSHI YAMAMOTO
200220 REBA JOHN
200240 ROBERT MONTEVERDE
200280 EILEEN SCHWARTZ
200310 MICHELLE SPRINGER
200330 HELENA WONG
200340 ROY ALONZO
For the record, the Java class that I'm running is here: -
vi JdbcTestDB2.java
import java.sql.Connection ;
import java.sql.DriverManager ;
import java.sql.ResultSet ;
import java.sql.Statement ;
import java.sql.SQLException;
class JdbcTestDB2
{
public static void main (String args[])
{
try
{
Class.forName("com.ibm.db2.jcc.DB2Driver");
}
catch (ClassNotFoundException e)
{
System.err.println (e) ;
System.exit (-1) ;
}
String hostname = args[0];
String port = args[1];
String dbName = args[2];
String userName = args[3];
String password = args[4];
String sslConnection = "false";
java.util.Properties properties = new java.util.Properties();
properties.put("user",userName);
properties.put("password", password);
String url = "jdbc:db2://" + hostname + ":" + port + "/" + dbName;
try
{
Connection connection = DriverManager.getConnection(url,properties);
String query = "select EMPNO,FIRSTNME,LASTNAME from DB2INST1.EMPLOYEE" ;
Statement statement = connection.createStatement () ;
ResultSet rs = statement.executeQuery (query) ;
while ( rs.next () )
System.out.println (rs.getString (1) + " " + rs.getString(2) + " " + rs.getString(3)) ;
connection.close () ;
}
catch (java.sql.SQLException e)
{
System.err.println (e) ;
System.exit (-1) ;
}
}
}
and I can easily run the same class from the host OS: -
/opt/ibm/java/jre/bin/java -cp $(pwd):$(pwd)/db2jcc4.jar JdbcTestDB2 carded1.fyre.ibm.com 50000 sample db2inst1 p455w0rd
For what it's worth, I have the IBM Java 8 SDK: -
ibm-java-sdk-8.0-5.41-x86_64-archive.bin
installed on the host OS ( Ubuntu 18.04.3 LTS )
Darknet Diaries and the Python Cheatsheet
I've recently been mainlining on back-episodes of the Darknet Diaries podcast, and, in one episode, the host, Jack Rhysider mentioned a Python cheat sheet that he'd written, and was sharing here: -
https://darknetdiaries.com/python/
Definitely worth listening to the podcast and, if you're coding in Python, consider getting the tutorial - it'll cost you one email address, which is cheap at thrice the price !
https://darknetdiaries.com/python/
Definitely worth listening to the podcast and, if you're coding in Python, consider getting the tutorial - it'll cost you one email address, which is cheap at thrice the price !
Sunday, 13 October 2019
Client Authentication and tinkering with various certificate formats
So, long story short, we have a service that builds Docker images, INSIDE a Docker container, and pushes the tagged and built images to Docker Hub ...
But that's not important right now ...
The key ( apologies for the pun ) thing is that the service exposes a series of actions via a REST API that is protected by TLS 1.2, to which we authenticate via a personal certificate.
This particular certificate is actually a PEM ( Privacy Enhanced Mail ) Base64-encoded DER file: -
dave.pem
which contains the personal certificate AND its private key: -
-----BEGIN CERTIFICATE-----
MIICojCCAYoCAQEwDQYJKoZIhvcNAQEEBQAwFzEVMBMGA1UEAwwMNTFiY2VlZmY5
N2M1MB4XDTE5MTAxMzA3NDIzNFoXDTIwMTAxMjA3NDIzNFowFzEVMBMGA1UEAwwM
...
-----END CERTIFICATE-----
-----BEGIN PRIVATE KEY-----
MIIEvgIBADANBgkqhkiG9w0BAQEFAASCBKgwggSkAgEAAoIBAQDfzS4kSVhgDxOq
FB1+WdBb8Dvc5OmxzruZ4H0B2Li9O/Bz1U/nUEj8iS6lF8LvUgUmD9zCY9lZALwz
H9MXazlc49asA5BEa7hyaHZ84b0ThkkJKr2TOoZncEFRPKoLpm0Zp39UGWg6PDt7
...
-----END PRIVATE KEY-----
Using that certificate, we can authenticate to the REST endpoint, such as this example: -
curl -k https://192.168.1.24:443/image --cert dave.pem
{"root_ssh_enabled":false,"status":"initialized"}
So far, so good.
We then wanted to perform a series of security tests against the same endpoint, using a product called AppScan Standard ( this used to be an IBM Rational offering, and has been recently transitioned to HCL ).
This DOES support client authentication BUT doesn't support a PEM file.
Therefore, we needed to convert the PEM file into a different format, Public-Key Cryptography Standards (PKCS), as either a .p12 or .pfx file.
This is nice n' easy using the Swiss Army knife of security - openssl - as per this: -
openssl pkcs12 -export -out dave.p12 -in dave.pem
and then validate it via cURL: -
curl -k https://192.168.1.24:443/image --cert-type p12 --cert dave.p12
{"root_ssh_enabled":false,"status":"initialized"}
So now we're good to go .....
Thursday, 3 October 2019
Retreading my steps - deleting directories with hyphens ...
I had an issue whilst trying to sort out some directories on my Mac, containing hyphens ( - ) as part of their names: -
Untracked files:
(use "git add..." to include in what will be committed)
--header
--url
rm: illegal option -- -
usage: rm [-f | -i] [-dPRrvW] file ...
unlink file
but I remembered hitting this a while back ....
which takes me back to a post that I wrote back in 2010: -
Removing files with hyphenated filenames in Linux
I'd had the same problem a few days ago - the problem is that the hyphen ( - ) character is seen by the rm command as an option.
The solution ? A quick rummage around Google threw this up: -
http://serverfault.com/questions/37823/how-to-delete-file-with-option-character-in-name-in-linux
Use the "--" option to tell rm that there are no more options coming, hence the command becomes: -
rm -Rf -- -6895560/
Job done :-)
So I tried that: -
rm -Rf -- --url
rm -Rf -- --header
which did the trick.
And now fgrep is happy ....
Untracked files:
(use "git add
--header
--url
which were causing fgrep to choke: -
fgrep -R
usage: fgrep [-abcDEFGHhIiJLlmnOoqRSsUVvwxZ] [-A num] [-B num] [-C[num]]
[-e pattern] [-f file] [--binary-files=value] [--color=when]
[--context[=num]] [--directories=action] [--label] [--line-buffered]
[--null] [pattern] [file ...]
I couldn't easily delete them: -
rm -Rf "--header"
rm: illegal option -- -
usage: rm [-f | -i] [-dPRrvW] file ...
unlink file
ls *header*
ls: illegal option -- -
usage: ls [-ABCFGHLOPRSTUWabcdefghiklmnopqrstuwx1] [file ...]
rm -Rf '--url'
rm: illegal option -- -
usage: rm [-f | -i] [-dPRrvW] file ...
unlink file
which takes me back to a post that I wrote back in 2010: -
Removing files with hyphenated filenames in Linux
I'd had the same problem a few days ago - the problem is that the hyphen ( - ) character is seen by the rm command as an option.
The solution ? A quick rummage around Google threw this up: -
http://serverfault.com/questions/37823/how-to-delete-file-with-option-character-in-name-in-linux
Use the "--" option to tell rm that there are no more options coming, hence the command becomes: -
rm -Rf -- -6895560/
Job done :-)
So I tried that: -
rm -Rf -- --url
rm -Rf -- --header
which did the trick.
And now fgrep is happy ....
Monday, 30 September 2019
The Last Argument
Now this is firmly in the realms of "I Did Not Know That" ....
Whilst tinkering with a private Docker Registry, I was reading this tutorial from Digital Ocean: -
How To Set Up a Private Docker Registry on Ubuntu 18.04
On the server you have created to host your private Docker Registry, you can create a docker-registry directory, move into it, and then create a data subfolder with the following commands:
mkdir ~/docker-registry && cd $_
mkdir data
The thing that perked my interest was the use of $_
I realised that this was somehow magically changing into the newly created ~/docker-registry subdirectory .....
How did this work ?
The internet had the answer ...
what does 'cd $_' mean?
$_ expands to the last argument to the previous simple command* or to previous command if it had no arguments.
mkdir my-new-project && cd $_
^ Here you have a command made of two simple commands. The last argument to the first one is my-new-project so $_ in the second simple command will expand to my-new-project.
In other words, the magic argument $_ means "Take the argument from the previous command i.e. my-new-project and run the cd command against it.
So, to take the first example further, I could've done this: -
mkdir -p ~/docker-registry/data && cd $_
which would: -
(a) create the entire path - ~/docker-registry/data
(b) change into it
which can be validated: -
pwd
/Users/hayd/docker-registry/data
Amazing !
Nginx and IP v6 - not best friends ...
Having installed Nginx on an Ubuntu 18.04.3 LTS box, I saw this: -
systemctl status nginx.service
● nginx.service - A high performance web server and a reverse proxy server
Loaded: loaded (/lib/systemd/system/nginx.service; enabled; vendor preset: enabled)
Active: failed (Result: exit-code) since Mon 2019-09-30 02:04:20 PDT; 7s ago
Docs: man:nginx(8)
Process: 8643 ExecStop=/sbin/start-stop-daemon --quiet --stop --retry QUIT/5 --pidfile /run/nginx.pid (code=exited, status=0/SUCCESS)
Process: 8477 ExecStart=/usr/sbin/nginx -g daemon on; master_process on; (code=exited, status=0/SUCCESS)
Process: 8644 ExecStartPre=/usr/sbin/nginx -t -q -g daemon on; master_process on; (code=exited, status=1/FAILURE)
Main PID: 8482 (code=exited, status=0/SUCCESS)
Sep 30 02:04:20 arnold.sideways.com systemd[1]: Starting A high performance web server and a reverse proxy server...
Sep 30 02:04:20 arnold.sideways.com nginx[8644]: nginx: [emerg] socket() [::]:80 failed (97: Address family not supported by protocol)
Sep 30 02:04:20 arnold.sideways.com nginx[8644]: nginx: configuration file /etc/nginx/nginx.conf test failed
Sep 30 02:04:20 arnold.sideways.com systemd[1]: nginx.service: Control process exited, code=exited status=1
Sep 30 02:04:20 arnold.sideways.com systemd[1]: nginx.service: Failed with result 'exit-code'.
Sep 30 02:04:20 arnold.sideways.com systemd[1]: Failed to start A high performance web server and a reverse proxy server.
As ever, Google helped: -
In essence, the problem was that Nginx was trying to bind to an IP version 6 ( IP v6 ) address, which wasn't available on this particular host.
This is controlled within the Nginx configuration file: -
/etc/nginx/sites-available/default
...
server {
listen 80 default_server;
listen [::]:80 default_server;
...
Once I removed ( commented out ) this line, and restarted Nginx: -
systemctl restart nginx.service
Nginx was A-OK: -
systemctl status nginx.service
● nginx.service - A high performance web server and a reverse proxy server
Loaded: loaded (/lib/systemd/system/nginx.service; enabled; vendor preset: enabled)
Active: active (running) since Mon 2019-09-30 02:10:02 PDT; 5s ago
Docs: man:nginx(8)
Process: 8643 ExecStop=/sbin/start-stop-daemon --quiet --stop --retry QUIT/5 --pidfile /run/nginx.pid (code=exited, status=0/SUCCESS)
Process: 9064 ExecStart=/usr/sbin/nginx -g daemon on; master_process on; (code=exited, status=0/SUCCESS)
Process: 9054 ExecStartPre=/usr/sbin/nginx -t -q -g daemon on; master_process on; (code=exited, status=0/SUCCESS)
Main PID: 9068 (nginx)
Tasks: 3 (limit: 2319)
CGroup: /system.slice/nginx.service
├─9068 nginx: master process /usr/sbin/nginx -g daemon on; master_process on;
├─9069 nginx: worker process
└─9070 nginx: worker process
Sep 30 02:10:02 arnold.sideways.com systemd[1]: Starting A high performance web server and a reverse proxy server...
Sep 30 02:10:02 arnold.sideways.com systemd[1]: Started A high performance web server and a reverse proxy server.
Friday, 20 September 2019
SSH and "Too many authentication failures" - a new one on me
Having created a new user on an Ubuntu 16.04 boxen, I started seeing this: -
Received disconnect from 192.168.3.123 port 22:2: Too many authentication failures
Disconnected from 192.168.3.123 port 22
Received disconnect from 192.168.3.123 port 22:2: Too many authentication failures
Disconnected from 192.168.3.123 port 22
whilst trying to SSH into the box, using the new account: -
ssh testfest@192.168.3.123
even though I was able to SSH using my own account ....
On the target box, I was seeing: -
Sep 19 16:21:24 ubuntu sshd[192635]: error: maximum authentication attempts exceeded for testfest from 192.168.6.124 port 54324 ssh2 [preauth]
Sep 19 16:21:24 ubuntu sshd[192635]: Disconnecting: Too many authentication failures [preauth]
Sep 19 16:21:48 ubuntu su[192609]: pam_unix(su:session): session closed for user testfest
One key (!) difference ....
For my own user, I'm using my SSH private key ...
For this new user, I'm using a password ...
There was a correlation ...
In my Mac's local SSH directory ( ~/.ssh ) I had a file: -
~/.ssh/config
which was set to: -
Host *
AddKeysToAgent yes
UseKeychain yes
IdentityFile ~/.ssh/id_rsa
In broad terms, my Mac was trying to be helpful and send MY private key to assert the identity of this new user ... which wasn't ever going to work ...
I tried moving ~/.ssh/config to ~/.ssh/cheese but to no avail.
As ever, Google had the answer ( and, yes, Google is my friend ) : -
This is usually caused by inadvertently offering multiple ssh keys to the server. The server will reject any key after too many keys have been offered.
You can see this for yourself by adding the -v flag to your ssh command to get verbose output. You will see that a bunch of keys are offered, until the server rejects the connection saying: "Too many authentication failures for [user]". Without verbose mode, you will only see the ambiguous message "Connection reset by peer".
To prevent irrelevant keys from being offered, you have to explicitly specify this in every host entry in the ~/.ssh/config (on the client machine) file by adding IdentitiesOnly like so:
Host www.somehost.com
IdentityFile ~/.ssh/key_for_somehost_rsa
IdentitiesOnly yes
Port 22
If you use the ssh-agent, it helps to run ssh-add -D to clear the identities.
Of course, I didn't think to enable verbose mode on the SSH client via ssh -v but ...
I did try the tip of clearing the identities: -
ssh-add -D
and ... IT WORKED!!
Every day, it's a school day !
Friday, 13 September 2019
Yay, we have a new mainframe with which to play .... IBM z15
Sharing an article from Patrick Moorhead, hosted at Forbes: -
IBM Galvanizes Its Place In Secure And Private Workloads With New z15 Platform
In the world of computers, one of the oldest and best-known in the industry is the IBM mainframe, which has existed since the 1960s. This week IBM unveiled the latest addition to its Z mainframe portfolio, a new platform called the “z15”, which was designed with data privacy, security and hybrid multicloud in mind. Let’s take a closer look at the offering, and what it means for IBM’s play for a seat at the secured hybrid cloud table.
IBM Galvanizes Its Place In Secure And Private Workloads With New z15 Platform
and we have one sitting in the machine-room less than 50 feet away from where I'm sitting right now ....
To say I'm excited is an under-statement .....
More to follow .....
IBM Galvanizes Its Place In Secure And Private Workloads With New z15 Platform
IBM Galvanizes Its Place In Secure And Private Workloads With New z15 Platform
and we have one sitting in the machine-room less than 50 feet away from where I'm sitting right now ....
To say I'm excited is an under-statement .....
More to follow .....
Friday, 6 September 2019
MainframerZ Skills meetup at Mediaocean in London - 2 October 2019
I'll be there, will you ?
MainframerZ Skills meetup at Mediaocean
Join us for our 4th MainframerZ meetup on Wednesday 2nd October. With the success of our last event, we'll be hosted again by Mediaocean near the Tate Modern.
This will be our first themed event, with focus on Z Skills. Come along for a range of lightning talks, discussions, and not forgetting of course, free pizza!
Meet other Z professionals, grow your network, and help continue to shape the future of MainframerZ!
We look forward to meeting new members and welcoming back some of our experienced members (and don't forget your MainframerZ badges!)
Want to share something at the event? Or start a discussion? Get in touch with our organisers, we'd love to hear from you.
Provisional Agenda
6:15 - 6:45 Arrival and registration
7:00 - 9:15 Introductions, talks, pizza and discussion
GitHub and SSH keys - so now I know
I've been using GitHub in seriousness for the past 7 months or so, since switching into a development role.
One of the oh-so-lovely things is that I can access my repositories using SSH, making git clone and git remote and git fetch and git rebase so much easier ...
I no longer need to muck about with HTTPS URLs and user IDs and passwords, like a cave person ...
Instead, I merely need to teach the git client about my SSH credentials, and I'm good to go.
This means, in part, generating an SSH public/private key pair using a command such as ssh-keygen as per the following example: -
ssh-keygen -b 4096 -t rsa -f /tmp/foobar -N ""
Generating public/private rsa key pair.
Your identification has been saved in /tmp/foobar.
Your public key has been saved in /tmp/foobar.pub.
The key fingerprint is:
SHA256:jdVHYm0U7hceMDZ594LaOhBTz+BC0YPTWtfl6eNfv3I hayd@Daves-MBP
The key's randomart image is:
+---[RSA 4096]----+
| .= oO=o.|
| + Boo=Boo|
| . *.*.o+++|
| =+. +o+ +|
| S+.o .=.|
| . . . ...|
| . . ..|
| o . E+|
| . o.+|
+----[SHA256]-----+

*UPDATE* And I can do this to get the fingerprint of ALL the keys: -
for i in ~/.ssh/*.pub; do ssh-keygen -l -E md5 -f $i; done
One of the oh-so-lovely things is that I can access my repositories using SSH, making git clone and git remote and git fetch and git rebase so much easier ...
I no longer need to muck about with HTTPS URLs and user IDs and passwords, like a cave person ...
Instead, I merely need to teach the git client about my SSH credentials, and I'm good to go.
This means, in part, generating an SSH public/private key pair using a command such as ssh-keygen as per the following example: -
ssh-keygen -b 4096 -t rsa -f /tmp/foobar -N ""
Generating public/private rsa key pair.
Your identification has been saved in /tmp/foobar.
Your public key has been saved in /tmp/foobar.pub.
The key fingerprint is:
SHA256:jdVHYm0U7hceMDZ594LaOhBTz+BC0YPTWtfl6eNfv3I hayd@Daves-MBP
The key's randomart image is:
+---[RSA 4096]----+
| .= oO=o.|
| + Boo=Boo|
| . *.*.o+++|
| =+. +o+ +|
| S+.o .=.|
| . . . ...|
| . . ..|
| o . E+|
| . o.+|
+----[SHA256]-----+
and then grab the public key: -
cat /tmp/foobar.pub
ssh-rsa AAAAB3NzaC1yc2EAAAADAQABAAACAQC+RhkGDj7zr86FLEkmhcQ5+bA9IwFGtdAVwq7bqkVvbbsWv4YtupknAEaao8epLAipZjHGgitlUskBGDlQc4TGTTyOHt6goYIjfetUv9XtWy4gsyF8k69x6NfvPZ/BFvLWSSc0LPH6+jYSs7ZNdzsqoafo7qr/nnjkCvD/raTUkuPgnoWFMAyKGcUbMHjaHHvOYf2DJriFoIlK+hSYO7tBj+Cf5OS1/DgNYHqSM8l3fVspM2fzyz2VAGEMZRsRWBh0CF7nKxc1aWp2gMzZEX5RJ9Lth+gIVIaWCixbuAerh82y4d/7eTHSh9OAOX/QNTwCC+eOTTaS7G/W+PoBSAx8wJi3xZapotOe43UgJ+KE+sRFjGXr/oe8w9IenfWiPiEAhdD9YHsOBCpvQ65zZLH75tGdKQ3Neu2wgP8os6qPTMU9S02wsit3vWsiAgLURRMX9Fat1XTI737B9rwdA/JnFMDf15szN9wg3nypRuvgtAtihhxJH87CT8R23XzlgNhCroYBkprlC+hGXmdyifxCFdSAgBo4xzm2XYRL63WBnfd8MOOLOoxxQDV8EYTW5PCS3grx3Rh07W6Lcs1Jnw6oYBUOpseZQHdzerX0mLuMoJL4uM3ZB+moTyi7UgsbMsBlPWO6xKTbhD3X4ZOhiMpBF/J9dJ3HfeFFnVU6Is6z2w== hayd@Daves-MBP
to the clipboard
PS On macOS, this is a simple matter of running pbcopy < /tmp/foobar.pub
We can then navigate to the Settings -> SSH and GPG keys page on GitHub: -
From there we can simply click the New SSH key button, give the to-be-added key a useful name e.g. Dave's MacBook, September 2019 etc. and paste in the public key from the clipboard.
This results in a new key: -

However, there is one small downside - GitHub merely shows the fingerprint of the newly added key: -
19:fd:a6:ff:44:a2:5a:11:06:75:0b:86:4d:c1:88:4c
which makes it somewhat hard to track back to an actual key pair, especially if one uses a less-than-explanatory name.
However, there is good news ....
This command: -
ssh-keygen -l -E md5 -f /tmp/foobar
can be run against the public OR private key ( they're a pair! ), and returns the fingerprint in the same MD5 format as GitHub uses: -
4096 MD5:19:fd:a6:ff:44:a2:5a:11:06:75:0b:86:4d:c1:88:4c hayd@Daves-MBP (RSA)
Notice that the fingerprint is the same !!
Now on an audit of my GitHub and GitHub Enterprise accounts ........
*UPDATE* And I can do this to get the fingerprint of ALL the keys: -
for i in ~/.ssh/*.pub; do ssh-keygen -l -E md5 -f $i; done
Thanks to this: -
for inspiration.
Subscribe to:
Posts (Atom)
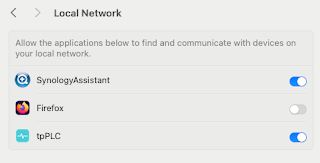
Note to self - Firefox and local connections
Whilst trying to hit my NAS from Firefox on my Mac, I kept seeing errors such as:- Unable to connect Firefox can’t establish a connection t...