Following an earlier blog post, I have this morning rebuilt my WebSphere Portlet Factory development environment in order to create portlets and widgets against WebSphere Portal v7.
I have a VMware image running WebSphere Portal Express v7 ( a 4 GB VM running on my shiny 8 GB Thinkpad ), and can access the portal via a shared IP address ( VMware is using NAT to allow my host and VMs to interact ). Therefore, I can get to Portal via an "external" browser and also via WPF - the hostname that my portal is using is wpx7.uk.ibm.com which is in my host OS' host file.
On my host OS ( Ubuntu Linux 10.10 ), I have installed WebSphere Portlet Factory v7 into an installation of Eclipse 3.5 ( Galileo ). I run WPF as root ( using the sudo bash command to allow me to emulate root without having the root password which Ubuntu doesn't use ).
Having started WPF with a nice clean new workspace ( /root/workspace ), I then created a WebSphere Portlet Factory Project, and chose to configure it against WP7.
I then created a new WebSphere Portlet Factory model, using the "A simple "Hello, World" model." quickstart - this allowed me to create a portlet AND an iWidget, each of which simply displays a message ( "Hello World!", of course ). Having created the model, which merely has five builders, including a Portlet Adapter and a Widget Adapter.
I took the option to deploy the model to my Portal server. The first time around this prompts me to either connect to the portal server via a shared file system ( which is quite painful when going from Linux to Linux e.g. you have to use SMB/Samba or NFS ) or, new in v7, via HTTP, which uses a SOAP call to update the file system on the remote box. I took the latter option; this updates the WPF project properties.
Having done this, the final step was to tell WPF to generate the iWidget which doesn't happen automatically the first time around.
To achieve this, I clicked the right-hand mouse button over the project name, and chose Widgets -> Publish Widgets to Lotus Mashups toolbox.
This prompted me for the credentials of the portal server - these can be entered each time, or cached.
Having done this, I then logged into Portal and, using the shiny new Page Builder Theme, I created a new page ( Actions -> New Child Page ) and then added my portlet and iWidget to the page ( Actions -> Edit Page -> Customize ).
*UPDATE* I've also provided a walk through, via screenshots, of the setup, and can share if required.
Geeking in technology since 1985, with IBM Development, focused upon Docker and Kubernetes on the IBM Z LinuxONE platform In the words of Dr Cathy Ryan, "If you don't write it down, it never happened". To paraphrase one of my clients, "Every day is a school day". I do, I learn, I share. The postings on this site are my own and don’t necessarily represent IBM’s positions, strategies or opinions. Remember, YMMV https://infosec.exchange/@davehay
Subscribe to:
Post Comments (Atom)
Note to self - Firefox and local connections
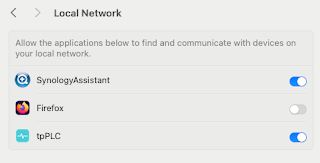
Whilst trying to hit my NAS from Firefox on my Mac, I kept seeing errors such as:- Unable to connect Firefox can’t establish a connection t...

-
Error "ldap_sasl_interactive_bind_s: Unknown authentication method (-6)" on a LDAPSearch command ...Whilst building my mega Connections / Domino / Portal / Quickr / Sametime / WCM environment recently, I was using the LDAPSearch command tha...
-
Another long story cut short, but I saw this: - curl: (58) unable to set private key file: 'dave.pem' type PEM from my Ansible...
-
Whilst trying to hit my NAS from Firefox on my Mac, I kept seeing errors such as:- Unable to connect Firefox can’t establish a connection t...

No comments:
Post a Comment